Showing posts with label blogger posts. Show all posts

Advanced Random posts widget for Blogger with image thumbnails and snippets

Posted On // Leave a Comment
When your blog has too many posts, visitors don't always have the time or desire to go through all the posts written there in order to make an idea of the blog's content. Thus, a random posts widget that will allow visitors to find content more easily could be really useful. This tutorial will show you how to add a random posts widget to display a list of posts in a random order with thumbnails and excerpts.


Check out the right sidebar to see a demo.

Steps to Show Random Posts with Thumbnails and Posts Summary in Blogger


Step 1. Login to your blogger account, select your blog and go to Layout.

Step 2. Add new widget by clicking on the Add a gadget link and select Html/JavaScript from the popup window.
html javascript widget, blogger gadgets

Step 3. After adding the Html/Javascript you need to grab the following code with styles attached.
<style>
#random-posts img{border-radius: 10px;float:left;margin-right:5px;
width:75px;height:75px;background-color: #F5F5F5;padding: 3px;transition: all 0.2s linear 0s;}
#random-posts img:hover{opacity: 0.6;}
ul#random-posts {list-style-type: none;padding: 0px;}
#random-posts a {font-size: 12px;text-transform:uppercase; padding: 0px auto 5px;}
#random-posts a:hover {text-decoration: none;}
.rp-snippet {font-size: 11px;background: none; padding: 5px; margin-right: 8px;}
#random-posts span {}
#random-posts li {margin-bottom: 10px;border-bottom: 1px solid #EEEEEE; padding: 4px;}
</style>
<ul id='random-posts'>
<script type='text/javaScript'>
var rdp_numposts=5;
var rdp_snippet_length=110;
var rdp_info='yes';
var rdp_comment='Comments';
var rdp_disable='Comments Disabled';
var rdp_current=[];var rdp_total_posts=0;var rdp_current=new Array(rdp_numposts);function totalposts(json){rdp_total_posts=json.feed.openSearch$totalResults.$t}document.write('<script type=\"text/javascript\" src=\"/feeds/posts/default?alt=json-in-script&max-results=0&callback=totalposts\"><\/script>');function getvalue(){for(var i=0;i<rdp_numposts;i++){var found=false;var rndValue=get_random();for(var j=0;j<rdp_current.length;j++){if(rdp_current[j]==rndValue){found=true;break}};if(found){i--}else{rdp_current[i]=rndValue}}};function get_random(){var ranNum=1+Math.round(Math.random()*(rdp_total_posts-1));return ranNum};
</script>
<script type='text/javaScript'> 
function random_posts(json){for(var i=0;i<rdp_numposts;i++){var entry=json.feed.entry[i];var rdp_posttitle=entry.title.$t;if('content'in entry){var rdp_get_snippet=entry.content.$t}else{if('summary'in entry){var rdp_get_snippet=entry.summary.$t}else{var rdp_get_snippet="";}};rdp_get_snippet=rdp_get_snippet.replace(/<[^>]*>/g,"");if(rdp_get_snippet.length<rdp_snippet_length){var rdp_snippet=rdp_get_snippet}else{rdp_get_snippet=rdp_get_snippet.substring(0,rdp_snippet_length);var space=rdp_get_snippet.lastIndexOf(" ");rdp_snippet=rdp_get_snippet.substring(0,space)+"&#133;";};for(var j=0;j<entry.link.length;j++){if('thr$total'in entry){var rdp_commentsNum=entry.thr$total.$t+' '+rdp_comment}else{rdp_commentsNum=rdp_disable};if(entry.link[j].rel=='alternate'){var rdp_posturl=entry.link[j].href;var rdp_postdate=entry.published.$t;if('media$thumbnail'in entry){var rdp_thumb=entry.media$thumbnail.url}else{rdp_thumb="https://blogger.googleusercontent.com/img/b/R29vZ2xl/AVvXsEh3BQHAMZ1-5Mc7R2TO9zqOgv8fd9lO9XVhZ_-9UmPS4AywScswb04eGb4prdvX7CyBD9TlWibIddqolS5Yg-e4-as0b5YNj8dfRwQvolhbPB0H7AZMhucLBaGqhtwZqbbWRipRo240WeA/s1600/no_thumb.png"}}};document.write('<li>');document.write('<a href="'+rdp_posturl+'" rel="nofollow"><img alt="'+rdp_posttitle+'" src="'+rdp_thumb+'"/></a>');document.write('<div><a href="'+rdp_posturl+'" rel="nofollow" title="'+rdp_snippet+'">'+rdp_posttitle+'</a></div>');if(rdp_info=='yes'){document.write('<span><div  class="rp-info">'+rdp_postdate.substring(8,10)+'/'+rdp_postdate.substring(5,7)+'/'+rdp_postdate.substring(0,4)+' - '+rdp_commentsNum)+'</div></span>'};document.write('<br/><div class="rp-snippet">'+rdp_snippet+'</div><div style="clear:both"></div></li>')}};getvalue();for(var i=0;i<rdp_numposts;i++){document.write('<script type=\"text/javascript\" src=\"/feeds/posts/default?alt=json-in-script&start-index='+rdp_current[i]+'&max-results=1&callback=random_posts\"><\/script>')};
</script>
</ul>
Step 4. Just paste this in the widget area and give widget the title of "Random Posts".

Random Posts Options

- Thumbnail dimensions: to change the size of the thumbnails in pixels, replace the 75px value.
- Summary length: you can control the the length of the summary (in characters) by changing the 110 value from var rdp_snippet_length=110;
- Post info: if you want to hide the post date and comment count change 'yes' from var rdp_info='yes'; to 'no';
- Font Size for Posts Titles and Summary: to modify the font size for the post snippet modify the 11px value and for the posts title, the 12px value;

Step 5. Click on the Save button and you're done! Your sidebar will display a random posts widget on each of your blog pages.
[Read more]

How to Create Magazine Style with Post Summaries and Thumbnails on Blogger

Posted On // Leave a Comment
The magazine or newspaper style templates are those that display the posts summaries in the homepage by stacking the columns on top of each other. This kind of templates is very popular nowadays, whether it is a news or technology blog, everyone needs a fresh magazine style layout for their blogs.

blogger tricks, blogger widgets, blogger templates
There are several ways to make posts appear this way. An option would be to use the Read more script to display a summary of the posts and add a conditional tag and a different style to the first post so that it will have a larger width than the older posts. So, in this tutorial I will show you how to create a magazine style for a Blogger Template. By following this tutorial, you can transform your boring and simple Blogger template to have an attractive and stylish magazine style layout.
To see a demo of it, please visit this blog

Adding the Magazine/Newspaper style to the Blogger Template

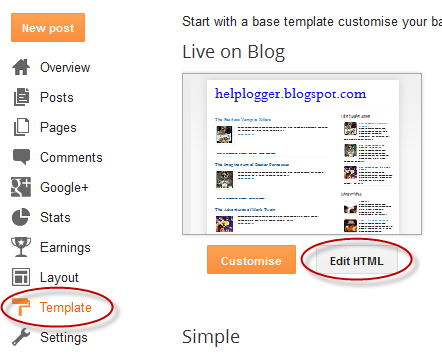
Step 1. Before anything please make a backup of your current template to make sure that you won't lose anything important - just log in on your Blogger Dashboard and go to Template, then click on the Backup/Restore button. After you've got a copy of the xml template, click on the Edit HTML button:

blogger edit html template

Step 2. Click anywhere inside the code area and search by using CTRL + F keys for this line:
<data:post.body/>
Note: You'll find it more than once, but stop to the second one in order to see the changes.

Step 3. Remove that line and instead it add this code:
<b:if cond='data:blog.pageType != &quot;item&quot;'>
<b:if cond='data:blog.pageType != &quot;static_page&quot;'>
 <span class='post-comment-link'><b:if cond='data:blog.pageType != &quot;item&quot;'><b:if cond='data:post.allowComments'><a class='comment-link' expr:href='data:post.addCommentUrl' expr:onclick='data:post.addCommentOnclick'><data:post.numComments/></a></b:if></b:if></span>
<div expr:id='&quot;summary&quot; + data:post.id'><data:post.body/></div>
  <script type='text/javascript'>createSummaryAndThumb(&quot;summary<data:post.id/>&quot;);</script>
<span class='readmorebutton' style='float:right'><a expr:href='data:post.url'>Read More &#187;</a></span></b:if></b:if>
<b:if cond='data:blog.pageType == &quot;item&quot;'><data:post.body/></b:if>
<b:if cond='data:blog.pageType == &quot;static_page&quot;'><data:post.body/></b:if>
Note: you can replace the Read More text, by changing the code in red

Step 4. Now find (CTRL + F) this line:
<b:include data='post' name='post'/>
Step 5. Remove this as well and instead of it add this:
<b:if cond='data:post.isFirstPost'>
<b:if cond='data:blog.homepageUrl == data:blog.url'>
<div id='first'>
<b:if cond='data:post.title'>
<h3 class='post-title entry-title'>
<b:if cond='data:post.link'>
<a expr:href='data:post.link'><data:post.title/></a>
<b:else/>
<b:if cond='data:post.url'>
<a expr:href='data:post.url'><data:post.title/></a>
<b:else/>
<data:post.title/>
</b:if>
</b:if>
</h3>
</b:if>
<div class='first-body'>

<b:if cond='data:blog.pageType != &quot;item&quot;'>
<b:if cond='data:blog.pageType != &quot;static_page&quot;'>
<div expr:id='&quot;summary1&quot; + data:post.id'><data:post.body/></div>
  <script type='text/javascript'>createSummaryAndThumb1(&quot;summary1<data:post.id/>&quot;);</script>
<span class='post-comment-link'><b:if cond='data:blog.pageType != &quot;item&quot;'><b:if cond='data:post.allowComments'><a class='comment-link' expr:href='data:post.addCommentUrl' expr:onclick='data:post.addCommentOnclick'><data:post.numComments/></a></b:if></b:if></span>
<span class='readmorebutton' style='float:right'><a expr:href='data:post.url'>Read More &#187;</a></span>
</b:if></b:if>
<b:if cond='data:blog.pageType == &quot;item&quot;'><data:post.body/></b:if>
<b:if cond='data:blog.pageType == &quot;static_page&quot;'><data:post.body/></b:if>

</div>
</div>
<b:else/>
<b:include data='post' name='post'/>
</b:if>
<b:else/>
<b:include data='post' name='post'/>
</b:if>
Note: you can change the Read More text here also, just replace the code in red with the text that you want to show.

Step 6. Now find the </head> tag and paste the following script before/above it:
<script type='text/javascript'>
posts_no_thumb_sum = 290;
posts_thumb_sum = 240;
img_thumb_height = 80;
img_thumb_width = 80;
first_no_thumb_sum = 600;
first_thumb_sum = 540;
img_thumb_height1 = 145;
img_thumb_width1 = 165;
</script>

<script type='text/javascript'>
//<![CDATA[
function removeHtmlTag(strx,chop){
if(strx.indexOf("<")!=-1)
{
var s = strx.split("<");
for(var i=0;i<s.length;i++){
if(s[i].indexOf(">")!=-1){
s[i] = s[i].substring(s[i].indexOf(">")+1,s[i].length);
}
}
strx = s.join("");
}
chop = (chop < strx.length-1) ? chop : strx.length-2;
while(strx.charAt(chop-1)!=' ' && strx.indexOf(' ',chop)!=-1) chop++;
strx = strx.substring(0,chop-1);
return strx+'...';
}

function createSummaryAndThumb(pID){
var div = document.getElementById(pID);
var imgtag = "";
var img = div.getElementsByTagName("img");
var summ = posts_no_thumb_sum;
if(img.length>=1) {
imgtag = '<span class="posts-thumb" style="float:left;"><img src="'+img[0].src+'" width="'+img_thumb_width+'px" height="'+img_thumb_height+'px"/></span>';
summ = posts_thumb_sum;
}

  var summary = imgtag + '<div>' + removeHtmlTag(div.innerHTML,summ) + '</div>';
div.innerHTML = summary;
}

function createSummaryAndThumb1(pID){
var div = document.getElementById(pID);
var imgtag = "";
var img = div.getElementsByTagName("img");
var summ = first_no_thumb_sum;
if(img.length>=1) {
imgtag = '<span class="first-post-thumb" style="float:left;"><img src="'+img[0].src+'" width="'+img_thumb_width1+'px" height="'+img_thumb_height1+'px"/></span>';
summ = first_thumb_sum;
}

var summary1 = imgtag + '<div>' + removeHtmlTag(div.innerHTML,summ) + '</div>';
div.innerHTML = summary1;
}

//]]>
</script>
Step 7. And below the script above add these CSS styles:
<b:if cond='data:blog.pageType != &quot;static_page&quot;'>
<b:if cond='data:blog.pageType != &quot;item&quot;'>
<style type='text/css'>
.first-post-thumb {
margin-right: 10px;
border: 1px solid #fff;
-webkit-box-shadow: 2px 2px 5px rgba(0,0,0,0.3);
-moz-box-shadow: 2px 2px 5px rgba(0,0,0,0.3);
box-shadow: 2px 2px 5px rgba(0,0,0,0.3);
}
.post-body img, .post-body .tr-caption-container, .Profile img, .Image img, .BlogList .item-thumbnail img {
background: none;
border: none;
box-shadow: none;
padding: 0;
}
#first { /* Styles for the First Post Container */
width: auto;
height: 250px;
float: left;
margin-bottom:10px;
background-color: #F4F4F4; /* background color for the first post */
border: 1px solid #E5E5E5; /* border for the first post */
}
.first-body { /* Style for the First Post summary */
color: #545454;
font-size: 13px;
text-align: justify;
padding: 5px 10px;
line-height:1.5em;
}
#first h3 a, #first h3 a:visited { /* Style for the First Post Title*/
border-bottom: 2px solid #DFDFDF;
color: #515151;
font-size: 20px;
display:block;
margin: 10px auto;
width: 95%;
font-size: 20px;
padding: 0px 0px 4px 0px;
font-weight: bold;
text-align:left;
line-height: 1.4em;
background: none;
}
#first h3 a:hover { /* Color on mouseover for the First Post Title */
color: #1061A1;
}
.post { /* Styles for the small posts container */
float:left;
margin-right: 10px;
width: 290px;
height: 210px;
padding: 0px 5px 5px 5px;
background: #FCFCFC; /* background color for the small posts */
border: 1px solid #E5E5E5; /* border for the small posts */
overflow: hidden;
}
.posts-thumb { /* Style for the small posts thumbnails */
margin-right: 5px;
background: #ddd;
padding: 3px 3px 0px;
border: 1px solid #C4C4C4;
border-radius: 4px;
}
h3.post-title a{ /* Style for the small posts titles */
font-size: 14px;
color: #747474;
background-color: #F4F4F4; /* Background color for the small posts titles */
width: 95%;
font-weight: bold;
font-family: 'Arial Narrow', sans-serif;
padding: 5px;
}
h3.post-title a:hover { /* Color on mouseover for the Small Posts Title */
color: #005B77;
}
h2.date-header { /* Hide the post date */
display:none;
}
.post-footer { display: none;}
h3.post-title {margin: 0px;}
.readmorebutton { margin-top: 5px;}

.readmorebutton a { /* Styles for the Read More link */
color: #767676;
border: 1px solid #E1E1E1;
background: #EAEAEA; /* Background color for the Read More link */
text-decoration:none;
padding: 3px 5px;
font-weight: bold;
font-size: 11px;
}
.post-comment-link { /* Style for the comment bubble of posts below */
float: right;
display: inline;
margin: -35px 0px;
border: 1px solid #E1E1E1; /* border for the comment bubble */
background: #EAEAEA; /* background color for the comment bubble */
font-size: 11px;
position: relative;
-webkit-border-radius: 100px;
-moz-border-radius: 100px;
border-radius: 100px;
}
#first .post-comment-link { /* Style for the comment bubble of first post */
margin: -200px 10px;
}
.post-comment-link a{ /* Link color for the comments bubble*/
padding: 10px;
color: #6A6A6A;
text-decoration:none;
font-weight: bold;
}
#blog-pager {clear:both;}
</style>
</b:if>
</b:if>
Customization:

1) At the beginning of the script from step 6, we have this section:
posts_no_thumb_sum = 290;
posts_thumb_sum = 240;
img_thumb_height = 80;
img_thumb_width = 80;
first_no_thumb_sum = 600;
first_thumb_sum = 540;
img_thumb_height1 = 145;
img_thumb_width1 = 165;
- The first number is the number of characters that will show for the small posts when there will be no image available
- The second number will be the number of characters that will show when the small posts will have an image
- The third and the forth line is for the height and width of the small posts thumbnails (images).
- The same goes for what is in blue, but this configuration affects only the first post. Since the first post is wider, it may contain a larger number of characters and we'll be able to make the thumbnail size larger.

2) And finally, we have the CSS styles. That last thing we added is a code that determines how the posts are going to look on the homepage (and archive pages as well, except for the first post).

To change the width an height, respectively the size for the first post container, look for these lines:
width: auto;
height: 250px;
Underneath the first post are the values for the other posts, just look for this part:
width: 290px;
height: 210px;
So, width is the width and height is the height of the other posts container. There you will have to experiment a bit with the sizes in order to make them appear correctly.

Finally set the number of posts to show on the homepage so that there will never be any empty space. Go to Settings >> Posts and comments >> Show at most and select the number of posts that you want to appear.
[Read more]

Add a Popular Posts Gallery just above your Blogger posts

Posted On // Leave a Comment
The most strong and popular web design trend over last couple of years is a sliding horizontal panels also known as Sliders or Carousels. It's a very effective method to increase the web site usability and engage the user. This widget shows the most popular 10 posts on your blog just above your Blogger posts. You can see the Demo on my blog.
Let's start adding it

Before adding it you should know that this widget is not fully compatible with all templates, so please make a backup before making any changes to your blogger template. Now, follow these steps:

1. Go to Dashboard - Template - Edit HTML - click anywhere inside the code area and press the CTRL + F keys to open the Blogger' search box
    2. Type or paste this piece of code inside the opened search box:
    ]]></b:skin>
    Note: you might need to click on the arrow next to it and after try to find ]]></b:skin> again.

    3. Just above/before it, add the following code:
    #gallery{position:relative;margin:0 35px 20px;width:590px;height:126px;background:#ffffff}
    #gallery .belt{position:absolute;top:0;left:0;list-style-type:none}
    #gallery .panel{float:left;margin:20px;width:84px;height:86px;background:url(https://blogger.googleusercontent.com/img/b/R29vZ2xl/AVvXsEjYbjq7duUbT9CGhvisJXH5dC7hnycO8oYOYDqQOaAvzDQVWAkqrNtlZfef2WximNWNpnHlmo26ll25g-xdhmuIQakXVzZfQ04Fc60luGdR2idRVbWT2nosjlpuqngVh8hLVupDKJ4cy7uy/s1600/bg-slider.png) bottom center no-repeat;overflow:hidden}
    #gallery .panel img{float:left;border:1px solid #DDD;margin:5px;width:72px;height:72px;background:#FFF;padding:0px}
    #gallery .panel img:hover{filter:alpha(opacity=50);-moz-opacity:0.5;-khtml-opacity:0.5;opacity:0.5}
    Note: you can adjust the size of gallery, changing the values in red (590 and 126).

    4. Now search for the following piece of code:
    </head>
    5. Just above/before it, add this code:
    <script src='http://ajax.googleapis.com/ajax/libs/jquery/1.4.2/jquery.min.js' type='text/javascript'/>
    <script src='http://helplogger.googlecode.com/svn/trunk/auto-slider.js' type='text/javascript'/>
    <script type='text/javascript'>
    //<![CDATA[
    stepcarousel.setup({
    galleryid: "gallery",
    beltclass: "belt",
    panelclass: "panel",
    autostep: {enable:true, moveby:1, pause:6000},
    panelbehavior: {speed:500, wraparound:true, persist:true},
    defaultbuttons: {enable: true, moveby: 2, leftnav: ["https://blogger.googleusercontent.com/img/b/R29vZ2xl/AVvXsEi7jV-UlSEhNgfiTWs2ldBpr3o0YOFVO1fxlFBdDBaeqV2U1WjoI4-5fB5vO4OxVx3g-UVV9eVU61pKsz4gJCI6jFp_AfpSZykDQPGac7RChLg1Ldg_B3KmEaxVZ5umKU4HVxakr833-ltj/s1600/prev.png", -40, 36], rightnav: ["https://blogger.googleusercontent.com/img/b/R29vZ2xl/AVvXsEjHUwZ960pZ3dwo7YvHDsTts3_4aTHUhibXTfkG87im5iiCC5pgCJCTNV-cvFky62EtTe2kcDF8snmuTV_Ac8aInwAblm3MJsZziop1Xw4zioZuBZFpmCR-q36Bk64sqjYuQKQ5RXKtWoSV/s1600/next.png", 2, 36]},
    contenttype: ["external"]
    })
    //]]>
    </script>
    Next thing to do is to place the widget just above the blogger posts.

    6. Search for this code:
    <b:section class='main' id='main' showaddelement='yes'>
    ...or if you can'find it, search for this one:
    <b:section class='main' id='main' showaddelement='no'>
    7. Just below it, add the following code:
    <b:widget id='PopularPosts2' locked='false' title='Popular Posts' type='PopularPosts'>
    <b:includable id='main'>
    <b:if cond='data:blog.url == data:blog.homepageUrl'>
    <div style='margin-top:20px;margin-bottom:70px;margin-left:-20px;'>
      <div id='gallery'>
       <ul class='belt'>
        <b:loop values='data:posts' var='post'>
         <li class='panel'>
          <b:if cond='data:showThumbnails == &quot;false&quot;'>
           <b:if cond='data:showSnippets == &quot;false&quot;'>
            <a expr:href='data:post.href' expr:title='data:post.title' rel='bookmark'><data:post.title/></a>
           <b:else/>
            <div class='item-title'>
             <a expr:href='data:post.href' expr:title='data:post.title' rel='bookmark'><data:post.title/></a>
            </div>
            <div class='item-snippet'>
             <data:post.snippet/>
            </div>
           </b:if>
          <b:else/>
           <a expr:href='data:post.href' expr:title='data:post.title' rel='bookmark'>
            <b:if cond='data:post.thumbnail'>
             <img expr:alt='data:post.title' expr:src='data:post.thumbnail'/>
            <b:else/>
             <img alt='no image' src='https://blogger.googleusercontent.com/img/b/R29vZ2xl/AVvXsEiG9_GZymFyRw-p5j96aVFGIsFrsHrZf4YXhcfYWFC-PuzP8hwRnMVdES_aUcYN_gdUfErPaPxp5yx2bUd-J_V7KthwunWoqJzWfahfqSIXUwUaPRSusGu7zw16kg8Q2DTAu0fHDidBFe0k/s1600/no-image.PNG'/>
            </b:if>
           </a>
          </b:if>
         </li>
        </b:loop>
       </ul>
      </div></div></b:if>
     </b:includable>
    </b:widget>
    Note: delete the fragments of code in blue if you want this widget to be displayed in posts pages also.

    8. Preview and if everything is ok, Save the Template.
    [Read more]
    Click to go to top